Showing posts with label Snacks. Show all posts

Sunday, August 20, 2023

Panang Curried Corn Chowder

There’s something about fusion cooking that I find exciting! I love combining the tastes of Thai Panang curry with all American corn chowder. Thai hot and sweetly spicy sauces combine with the comfort food taste of potatoes and corn, all in a chowder. How fun is that? I’ve made this recipe super quick and easy by taking the shortcut of using a premade curry sauce instead of making the sauce from scratch. I’ve found Panang curry sauces at a local Asian market, but also at specialty food stores like Sprouts or Whole Foods. 

Ingredients 

1 tsp olive oil
1/2 cup chopped sweet onion
1 clove garlic, minced
1/2 cup chopped red pepper
1/2 cup sliced mushrooms 
1 cup diced potatoes, Yukon gold or white potatoes 
1 cup corn
1 13 oz jar Panang curry sauce
1-1/2 cups chicken stock
1/4 tsp red pepper flakes
1/4 cup Thai basil, chopped with a few florets left whole for garnish

Directions 

Heat the olive oil in a soup pot set over medium heat. Add the onion, garlic, pepper, and mushrooms. Cook for several minutes until the onions are translucent and the mushrooms begin to brown. Add the curry sauce and chicken stock. Reduce the heat to low and simmer until the potatoes are tender. Ladle the soup into bowls, topping with a pinch of red pepper flakes and some of the Thai basil. Garnish each bowl with a Thai basil floret. Enjoy! 

Stealthy Cooking Tip: Fusion cooking is a fun way to introduce new flavors. It’s also a way to shake up your menu pattern, giving your tastebuds something new to explore. 

Monday, June 12, 2023

Cicchetti Appetizers

Cicchetti (pronounced "chi-KET-tee") are small plates popular in Venice. They're like appetizers, but can just as easily be eaten for lunch or as a delicious snack in mid afternoon. It's said that the name derives from the Latin word ciccus, which means "little". These may be little, but they're big on flavor! We had cicchetti at a very posh (and expensive) restaurant, but the cicchetti were very reasonably priced, making it well worth our while to have stopped here. And, it was the cicchetti in the window that drew our attention, not the lunch menu. I've included the photo of the vegetarian version and a fish version that I had for lunch but, at least so far, I've only recreated the vegetarian version!

Ingredients: 

4 slices baguette, sliced on the diagonal
1 Tbs olive oil
1 eggplant, sliced lengthwise into 1/2 inch thick slices
1 zucchini, sliced lengthwise into 1/2 inch thick slices
1 red pepper, sliced lengthwise into 1/2 inch thick slices
4 vertical slices sweet onion
1 Tbs extra virgin olive oil
1 clove garlic, peeled and minced
several grinds of sea salt
several grinds of pepper

Directions: 

Heat a grill pan over medium high heat. Toss the vegetables in the olive oil, then season with garlic, salt, and pepper. Place the vegetable in the grill pan. Cook until grill marks appear, then rotate once, to make hatch marks on the vegetables. Turn the vegetables over and repeat. The finished vegetables should be cooked through, so they are soft and pliable, but not browned. Toast the baguette slices, then brush with the extra virgin olive oil. Pile some of the arugula, then arrange one slice each of the eggplant, zucchini, onion, and red pepper onto a baguette slice. Repeat with all four slices. You can anchor them with a toothpick if they're unruly!

Serves 4 as a light appetizer or 2 as a light lunch


Stealthy Cooking Tip: If you're looking to save some money, yet still enjoy incredible tastes, look for restaurants that are available to serve appetizers and drinks. We had cicchetti, followed by desserts and coffee at Oficina Ormesini. We enjoyed our food immensely, at a fraction of the cost of a full meal. 


Wednesday, May 27, 2020

Rhubarb Orange Compote


Compotes were fruity desserts in medieval times. Now, they are sweetened fruits that can make an appearance on a dessert or appetizer tray or can be served alongside meats during a main course. I made this rhubarb compote with the last of the rhubarb from my yard and used kumquats instead of orange juice. I found a kumquat tree (on public land) with fully ripened fruit just waiting to be used! It was fun to harvest a few kumquats by climbing the tree and shaking the limbs until the ripest fruit landed below. Kumquats are little oranges that can be eaten whole, or used in place of oranges.

Ingredients:

2 cups rhubarb, cut into 1/2 inch pieces
1/2 cup quartered kumquats (or 1/2 cup orange juice and 1 tsp orange zest)
1/2 cup sweetened dried cranberries
1/2 cup chopped onion
1/3 cup brown sugar
1/3 cup sugar
1/2 cup red wine vinegar
1 Tbs minced crystallized ginger or ginger
1/2 tsp cinnamon
1 tsp curry powder (optional)
1/4 tsp black pepper

Directions:

Mix all ingredients together in a saucepan. Bring to a boil, reduce to a simmer and cook for 20 minutes if using kumquats or 30 minutes if using orange juice. Taste and enjoy. Makes about 2 cups.

Serves 4 for dessert or 8 as an appetizer or a sauce for meat

Stealthy Cooking Tip: I've been using up ingredients in new and unusual ways during this difficult time of shopping during a pandemic. I don't want anything to go to waste, but I certainly want everything to taste delicious! This will keep for several weeks in the refrigerator, so make some up now if you're ready to harvest your last rhubarb for the season. 

Wednesday, October 9, 2019

Caprese Skewers

Summer is a great time for pot luck picnics. It's also a great time for tomatoes and basil. Here's an easy to put together dish that's also easy to transport and needs minimal refrigeration. These disappeared when I took them to a recent picnic, so they must be as good as they look. They're even better if you have either vine ripened or home grown tomatoes and basil.

Ingredients:

24 grape tomatoes
24 leaves of basil
24  bocconcini or rounds of buffalo mozzarella

24 toothpicks

Directions:

Thread one grape tomato, 1 leaf of basil and one piece of mozzarella on each toothpick. Arrange on a platter and serve.


Makes 24 appetizers

Stealthy Cooking Tip: Bocconcini are small rounds of fresh mozzarella cheese. Buffalo mozzarella are bigger rounds of fresh mozzarella. Both taste the same. Bocconcini are sometimes difficult to find, but I can usually find the large rounds of buffalo mozzarella. If you use the large rounds, simply cut them into 24 pieces. If you can't find any fresh mozzarella (that sometimes happens!), you can use regular mozzarella. I've used the mozzarella cheese sticks, and simply cut them into bite size pieces!

Sunday, November 27, 2016

Spiced Pecans

It's the time of year for fresh pecans. Cooking them with sugar and spices will fill the house with smells of the season. Cinnamon, cloves, nutmeg, and a taste of cayenne will warm your palate!

Ingredients:

1/2 cup sugar
1/3 tsp salt
1 tsp ground cinnamon
1/4 tsp ground cloves
1/2 tsp ground nutmeg
1/4 tsp cayenne (optional)
2 Tbs. water
3 cups pecans (or other nuts)

Directions:

Preheat the oven to 350F. Mix the sugar through the water in a microwave safe container, such as a glass bowl. Heat the mixture on high for 30 seconds, then stir to combine the sugar and spices with the water. Pour the nuts into the sugar and spice mixture. Stir to coat the nuts with the mixture. Spread the nuts on a cookie sheet. Bake at 350F for about 10 minutes. Remove the nuts, and cool. These will keep for about a week.

Serves 12 as an appetizer

Stealthy Cooking Tip: Warning! These nuts can be addictive!While nuts are a healthy choice in moderation, it's definitely hard to eat just a few of these tasty morsels. The best bet? Either serve them when you've got a crowd to help you eat them, or hide them in the cupboard and only bring out a few at a time, for snacking on a cheese and nut tray or to add to a salad. 

Tuesday, September 29, 2015

Pineapple Salsa

This salsa was born when I had leftover fresh pineapple, and I was serving grilled pork with Latin style vegetables. I figured that a fresh salsa would work in, and it sure did! This salsa goes well with all sorts of grilled or prepared meats, as well as chips.

Ingredients:

1 cup chopped fresh pineapple
1/4 cup chopped red onion
1/2 cup chopped red pepper
1/2 cup chopped tomato
1/4 cup chopped jalapeno peppers (optional)
juice of 1/2 lime
2 Tbs. chopped cilantro

Directions:

Mix all the ingredients together, and serve.


Serves 4 as a topping on a meal, 2 as a salsa for appetizer, easily doubled

Stealthy Cooking Tip: Vary the amounts in this salsa according to your taste. I used more pineapple when I made this up, and served the tomato on the side to satisfy one of my eaters with an allergy. 


Friday, August 22, 2014

Blistered Shishito Peppers


Shishito and padron peppers are all the rage in Sacramento. Last year I could only find them occasionally in the farmer's market. They were the secret darling of cutting edge chefs. This year, they're making appearances every week at the farmer's market and I've seen them at Whole Foods. As for chefs, I've seen them on not just one, but four restaurant menus this summer. They usually appear as the chef's special appetizer. I expect to see them any day now in every green grocery aisle.

Both peppers are similar, usually mild, with just an occasional spicy kick. They are frequently served grilled, either pan grilled as I've done here, or broiled under a low broiler. The point is to cook the peppers only until slightly blistered. The olive oil adds flavor, and more importantly, allows the salt to stick! If you have larger grained salt, this is the place to use it. The larger grain allows you to use less salt, and still get both the crunch and flavor.

Ingredients:

2 cups whole Shishito or Padron peppers
2 tsp. extra virgin olive oil
1/4 tsp. sea salt

Directions:  Toss the peppers with the olive oil. Heat a grill pan on high and cook the peppers, tossing them (or stirring them) from time to time, so that they blister on all sides. Add the sea salt and serve.


Serves 4

Stealthy Cooking Tip: As you can see, I've used red Hawaiian salt. The larger salt crystals really pack a punch, and I don't have to use much. Also, salt is a wonderful cooking memory to bring back from a vacation. It lasts a long time, and is easy to pack!


Thursday, December 5, 2013

A Better Cheese Plate


The holidays means entertaining ... having friends and family come together to share special moments, moments we enhance with food, and snacks. I see cheese trays everywhere in the stores and advertisements - Trays laden with a variety of cheeses, set conveniently next to a tray of crackers. Don't get me wrong, I love, love, love cheese and crackers. I'm the first to admit that I love them a bit too much. If cheese and crackers are out as a pre-dinner snack, I'll eat so many that I don't really need any dinner. But I remember reading something that made me laugh ... eating cheese is better than eating straight butter. And, the cheeses made with low salt and low fat? Please, don't make me! So, here's a better, and healthier, idea. Mix fruits, vegetables, a few nuts for crunch, and a sweet treat right on the cheese plate. Forget the crackers. Try small bits of really tasty cheese with the fruits to see which combinations you like best. You'll have fun, and so will your guests.

Ingredients:

2 slices of sharp or other cheese with personality per person
2-4 slices of several fruits per person
4 almonds or hazelnuts per person
1 handful of dried fruit per every 2 people
1 large spoonful of something sweet (jam, marmalade, chutney, honey) per every 2 people

Directions:

Arrange everything attractively on a plate, and serve.

The tray I've pictured here serves two. It includes, from front to back:

Dried cranberries, Manchego cheese, persimmon slices (our last one of the season), 1 slice of prosciutto cut into pieces, 1/2 apple cut into slices, almonds, and mango chutney.

Stealthy Cooking Tip: Can't live without the crackers? Look for ones made with whole grains, then include only about 2 to 4 crackers, depending on size, per person.

Wednesday, September 5, 2012

Grilled Padron Peppers

 
Padron peppers are small green peppers, often served as a tapas dish at Spanish restaurants. You can find their cousins, shishito peppers, on Japanese sushi menus. In the Americas, it's easy to find small multi-colored peppers, yellow, orange and red, that are the same size. It doesn't matter what kind of pepper you use in this recipe - the result will be similar, always a tasty and healthy bite for a snack or appetizer, with the difference being the amount of spicy heat. Padron peppers are not generally hot, but it's a game of pepper roulette, because about 1 out of 10 peppers is very hot and spicy. Shishito peppers taste and look almost identical to the non-spicy padrons, with only a rare appearance of spice. The red, orange, and yellow peppers are the most mild tasting of all the peppers, with never any heat.


Ingredients:

12 small peppers, padron, shishito, or small red, orange, and yellow
1 tsp olive oil
1 pinch fleur de sel or other excellent salt

 
Directions: Spray a large grill pan with olive oil and place the pan on the stove top over medium high heat. Wash and dry the peppers, then toss with the olive oil. Cook the peppers on the grill pan until the skins begin to blister, about 3 minutes per side. Remove the peppers from the pan, and drain on paper towels to remove most of the remaining olive oil. Sprinkle the salt over the peppers and serve.

Serves 4


Stealthy Cooking Tip: Use the peppers as part of an appetizer tray. I grouped them with an olive assortment and pepperdaw (sweet pickled) peppers. Other choices might be a small amount of cheese, carrots, or small grape tomatoes.

Tuesday, August 28, 2012

Stuffed Zucchini Blossoms


Here's another farmer's market goodie I couldn't resist - zucchini blossoms. I usually either pick up some at the farmer's market or pick them from my garden and fix them this way. I love the combinations of textures, the crunchy flowers and the soft cheese filling. Buy the female flowers with baby zucchini attached, or the male flowers with a long stem. The zucchini blossom will cook up just the same. I don't usually serve fried food, but these are the exception. They're cooked in the smallest amount of oil possible to still yield crunch. Canola oil has a higher smoke point than the olive oil I usually cook with. That means the flowers can be cooked at a higher heat - meaning there's more crunch for the bite, and less oil absorbed. Besides being tasty, how often can you say, "we're eating flowers for dinner tonight"?


Ingredients:

12 zucchini blossoms
2 oz goat or ricotta cheese
2 Tbs chopped fresh basil (about 6 large leaves)
1/4 tsp minced garlic
1 egg
2 Tbs flour
1 Tbs grated Parmesan cheese
a grind of salt and a grind of pepper
1 Tbs canola oil

Directions:

Clean the zucchini blossoms. If you have female flowers, remove the baby zucchini and the inner flower parts. If you have male flowers, remove the inner flower parts. Mix the cheese together with the basil and garlic. Stuff each flower with about 1/2 to 1 tsp of the cheese mixture, depending on the size of the flower. Set the stuffed flowers aside while you break the egg into a bowl and slightly beat it. Mix the flour together with the Parmesan, salt and pepper on a plate. Heat the canola oil over medium high in a large nonstick skillet. Dip each filled zucchini blossom first into the egg, then roll in the flour mixture, and finally place in the skillet. Cook the zucchini blossoms about 2 minutes per side, until brown and crunchy. Remove from the skillet and drain any residual oil onto paper towels before serving.

Serves 4


Stealthy Cooking Tip: These can also be cooked with the baby zucchini attached. Then, you're getting a young, tender zucchini bite with each crunchy, cheese filled flower.

Friday, June 22, 2012

Matcha Sesame Encrusted Tuna

Matcha sesame ... I love the sound of it. "Matcha Sesame." Like something from an old movie, picture Rudolph Valentino mouthing the words (with an Italian accent) in a silent film. However exotic sounding, Matcha sesame is a delicious crust for fish. This tuna is quickly sauteed, but the crust would work equally well baked or grilled.

I served this recently as an appetizer, with a crisp white wine. But, I've also had it as a main course alongside a vegetable and a salad.

Ingredients:

2 tsp matcha green tea
1 Tbs black sesame seeds
1 Tbs white sesame seeds
several grinds of sea salt and pepper
8 oz piece of fresh ahi tuna

Chipotle Dipping Sauce:

1 chipotle pepper in adobo sauce
2 Tbs mayonnaise
2 Tbs lemon honey salad dressing


Directions: Mix matcha, seeds, salt and pepper on a plate. Dredge tuna in mixture. Heat a grill or saute pan on high heat. Cook the tuna, about 1 minute per side, until crust forms and tuna is seared. To make the chipotle dipping sauce, mix all ingredients together in a blender. Blend until the pepper is broken into smallish pieces.

Slice the tuna, across the grain, into slices about 3/8 inch wide. Serve with the sauce on the side.

Serves 4-8 as an appetizer, or 2 as a main dish.

Stealthy Cooking Tip: Matcha green tea has been hailed as a great source of antioxidants. That stands to reason as most green teas are good sources. What makes matcha stand out from the others is that the tea leaves are ground and eaten, so we're taking in more of a good thing. The tea flavor is rather subdued, but the bright color makes the dish stand out.

Monday, June 18, 2012

Nachos


What better kid food? Nachos, good for a snack, for lunch, try them for dinner. Kids (of all ages) think they're having junk food - only you and I know better! Nachos can be just as healthy as you make them.
Ingredients:

1 tortilla per person
1 can low salt, fat free refried beans
1/4 pound ground turkey (optional)
1/2 cup chopped onion
1/4 cup chopped Anaheim chili peppers
1/2 cup grated low sodium Mexican cheese blend
1/4 cup chopped black olives
1/2 cup fresh tomato salsa
1/2 cup fresh corn salsa
1/2 cup fresh guacamole
1/2 cup plain Greek yogurt

Directions:
Preheat oven to 400F. Cut tortillas into large pieces. Place tortilla pieces on a baking sheet and bake for 5 minutes, turn and continue baking until they begin to color, about 3 more minutes. Remove from oven.
Cook the ground turkey and onion while the tortillas bake. Heat a skillet on the stove top. Add the ground turkey and chopped onion. Cook until the turkey is no longer pink and begins to brown, about 5 minutes. Remove from heat.

Prepare nachos on a large, oven proof dish. I use a Mexican style platter and heat the nachos directly on the same dish I serve them on. Spread the refried beans in the center of the dish or platter in a circular pattie. I spread it out into a largish pattie about 5 inches in diameter, and about 3/4 inch thick. Stick the cooked tortilla pieces or "chips" in a circular pattern in the beans. Sprinkle the cooked turkey and onion mixture on top. You can either sprinkle the chilies and olives on top, or serve them on the side. Top the mixture with the cheese. Heat in the oven, until the cheese melts and the beans are warm, about 5 minutes. Serve the  salsas, guacamole, and yogurt along the side as dips for the bean covered chips.
Serves 4
Stealthy Cooking Tip: This one is really kid friendly! Have the kids help put this together, then watch them gobble it up. I use Greek yogurt in place of sour cream, as the yogurt is lower in saturated fat than sour cream. If you have time, make your own side dips, as you can control sodium, preservatives, and fats. If you don't have time, look for healthier versions at the market.

Thursday, April 5, 2012

Dinosaur Eggs


These are a take on pickled beet eggs, prepared in pickled beet juice so they come out a bright color, but prepared in the manner of 1000 year old eggs. Pickled beet eggs are made by placing peeled hard boiled eggs in a beet pickling mixture. 1000 year eggs (which aren't really 1000 years old!) are made by placing unpeeled hard boiled eggs which have their shells cracked in a coloring mixture, usually tea. These "dinosaur" eggs are unpeeled, cracked, then placed in red beet juice until they take on a crazy quilt bright color. The photo below shows the difference between the finished eggs. The dark red ones are pickled beet eggs, and the ones with the variegated color are the dinosaur eggs.


Ingredients:

1 bunch fresh beets, about 4 to 6
2 cups water
6 eggs
1 cup vinegar
1/2 cup sugar
1 cinnamon stick
6 cloves


Directions:

Hard boil eggs by placing eggs in a saucepan and covering with cold water. Bring to a boil, then remove from heat, cover and let sit for 10 minutes. Drain eggs.

Cut off beet greens, if attached, and save for another use. Cut off the root end of the beets, then scrub the beets well. Place beets in 2 cups water and boil for about 10 to 15 minutes, depending on the size of the beets, until the beets are tender and can easily be pierced with a fork. When done, remove the beets from the water, saving the water. When the beets have cooled enough to handle, you can easily slip the skins from the beets. Slice the cooked and peeled beets.
Heat the vinegar and sugar together in a microwave safe container until the sugar is dissolved. Add the vinegar sugar mixture, along with the cinnamon stick and cloves, to the beet cooking juice and stir to combine.

Using the back of a spoon, crack the hard boiled eggs all over their shells. You'll be making the pattern that will be seen on the finished eggs. Alternatively, you can shell some of the eggs to get a deeper purple color. Place the cracked or peeled hard boiled eggs into a container, then add the cooked beets, and cover them with the beet juice mixture. Cover the container and refrigerate overnight or for 24 hours.

Carefully lift the hard boiled eggs out of the beet juice. I say carefully because beet juice stains! Peel the eggs. Serve the beets as is as "dinosaur" eggs for breakfast, use them to make deviled eggs, or top a salad with the sliced eggs. The dinosaur eggs have a nice pattern, and have a faint sweet pickle taste. If you make straight pickled eggs, they'll have a deeper color, and will taste stronger. Pickled eggs are also great with a sprinkle of salt and a cold beer!

Serves 6


Stealthy Cooking Tip:  A nice by-product are the pickled beets. If you haven't had home made pickled beets, you're in for a real treat! People who don't usually like beets may change their mind when they taste these.

Thursday, March 29, 2012

Stuffed Kumquats


Citrus season may have passed its peak, but there's still some excellent citrus to be found. I'm so fortunate to have citrus trees in my backyard, and many of my friends and neighbors do, too. In March, I've got juice oranges (the last one came off the tree yesterday), super sweet satsuma oranges (long gone), and still have dozens of huge, tasty lemons. What I don't have, I can usually find - either through a friend or at my local farmer's market or grocery. Many thanks today to my friend Marie for passing along some of her backyard kumquats! They're delicious as is, just popping a whole one in my mouth, or in any number of dishes. Here's an appetizer, dessert, or snack dish that's easy to make and tasty to eat. It's inspired by Marie's old Sunset recipe and her tale of how she served a similar dish as an appetizer at a party, then watched them quickly disappear. Each one is the perfect size for a single bite.

Ingredients:

8 kumquats
1 Tbs low fat or fat free cream cheese
2 Tbs fat free Greek yogurt
1/2 tsp sugar
1 Tbs minced crystallized ginger
16 very small mint leaves (or minced mint leaves)


Directions:  Cut the kumquats in half, lengthwise. Remove inner seeds, pulp,and membranes, leaving only the skin. I found this easiest to accomplish with a fingernail, but I think a grapefruit spoon would work equally well. Mix the cream cheese, yogurt, sugar and crystallized ginger together in a small bowl. Spoon about 1 teaspoon into each of the kumquat halves. Top each kumquat with a small piece of mint.

Makes 16, serves 4 with 4 pieces each.

Stealthy Cooking Tip: Kumquats are small, and I mean tiny compared to their larger orange relatives. They're only about 1 inch long! They really can be eaten whole, my all time favorite way with them is to just pop them into my mouth. They have a tender peel, and that's the sweet part. The inside pulp and membranes are the sour part. Like oranges, kumquats are high in vitamin C. Because the peel is eaten, kumquats are also high in fiber.

Tuesday, August 9, 2011

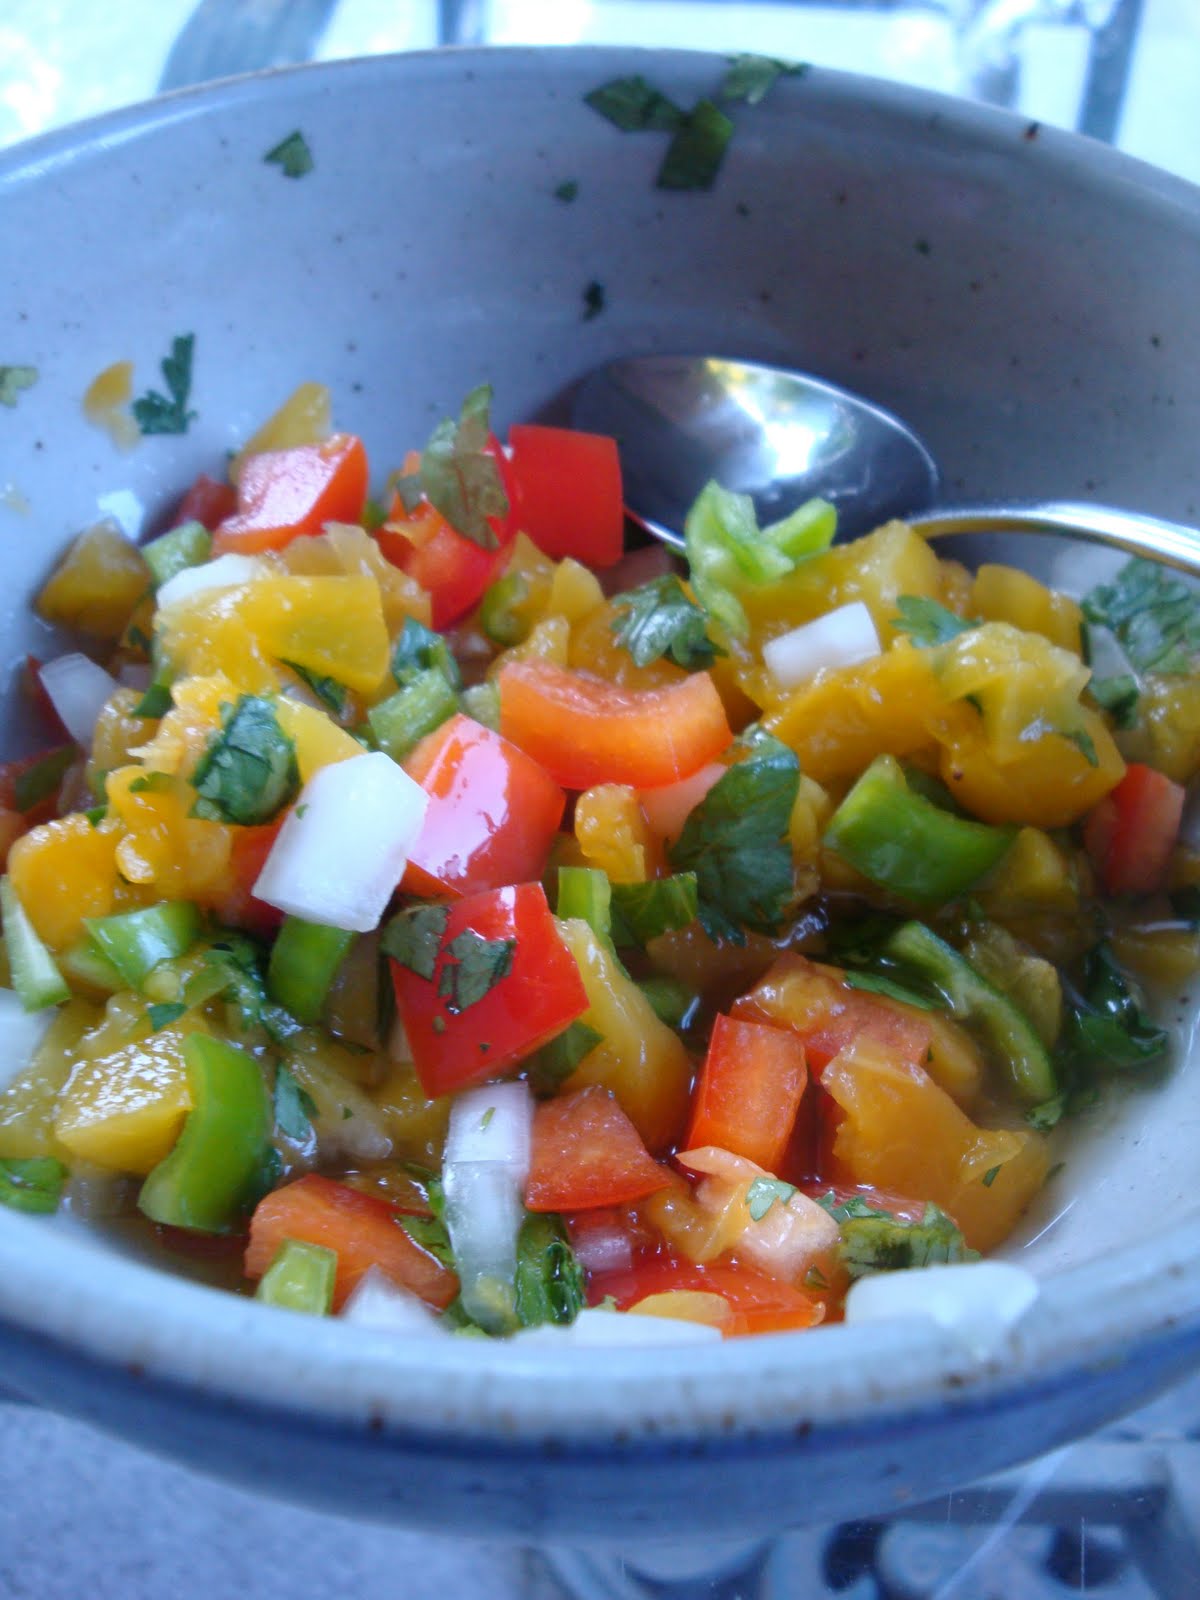
Peach Salsa

Here's a salsa that's good on it's own, or use it as I did - as a topping for grilled pork tenderloin.

Ingredients:

2 peaches, peeled, pitted, and cubed
1/4 cup chopped onion
1/4 cup chopped red pepper
1 Anaheim chili, chopped
1 jalapeno, minced
1 Tbs cilantro, chopped

Directions: Mix everything together. Enjoy!

Stealthy Cooking Tip: The amount of each ingredient in salsa can be varied according to your taste. Add more or less of anything. When I made this recently, I used leftover canned peaches - or you can use whatever kind of fruit you have on hand: plums, mango, pineapple are some ideas.

Monday, October 18, 2010

Salsa Fresca

Fresh salsa makes use of the best flavors of summer, even the end of summer! Fresh tomatoes along with fresh peppers and plenty of cilantro, add some chips or enjoy it on top of eggs. Here's another way to add some veggies to your meals or snacks.

Ingredients:

2 cups diced tomatoes, about 8 Roma tomatoes
1/2 cup diced red onion
1/2 cup diced Anaheim chili, or green pepper
1 minced jalapeno pepper (see Stealthy Cooking Tip below)
1/2 tsp minced garlic
juice of 1/2 lime
1/4 cup minced fresh cilantro
1/4 tsp freshly ground sea salt
1 tsp extra virgin olive oil (optional)

Directions:

Remove the core from the stem end of the tomatoes, and dice them into about 1/4 inch cubes. Dice the red onion and Anaheim chili or green pepper about the same size, 1/4 inch by 1/4 inch. Mince the jalapeno pepper and garlic very small. Roll the lime before cutting it in half, as this helps to release the juices. Cut the cilantro, including both leaves and stems. Mix everything together into a glass bowl. Taste and correct the seasoning by adding salt. If the salsa needs more flavor, you can add a little bit of extra virgin olive oil. This recipe is very flexible. Add more tomatoes if you really like tomatoes, or add more peppers or onions if that's a taste you prefer. Just play with this, and you'll find a new favorite.

Stealthy Cooking Tip: Jalapeno peppers vary in their heat. Some of them are very hot, and others are very mild. However, they're all usually hot enough to affect your hands when you're cutting them. That said, wear gloves! Removing the seeds will significantly cool the heat, and removing the white membranes will cool the heat even further. That's because the capsacin is found in the membranes and seeds. Vary the amount of jalapeno, so that it suits your tastebuds.


Wednesday, February 10, 2010

Roasted Corn Salsa

With last weekend's SuperBowl Game, I prepared some healthier tailgate type food for those who like to eat during half time. We had ribs, to be sure, but we also had this corn salsa along with a green salad.

Ingredients:


2-1/2 cups roasted corn kernels (1 lb bag of frozen roasted corn)
1 cup chopped red pepper
1/2 cup chopped red onion
1/4 cup minced parsley
1 Tbs minced jalapeno pepper (optional)
1/4 tsp red pepper flakes
1/2 tsp salt
1/4 tsp black pepper
3 Tbs lemon juice
1 Tbs olive oil

Directions:

The frozen corn can be either used either thawed or frozen, depending on when you'll be serving the salsa. If it needs to be thawed quickly, microwave the corn in a microwave safe bowl for 1 minute intervals until it is no longer frozen. Place the red pepper into a microwave safe bowl and cook on high power for 2 minutes. Combine all of the vegetables and spices (corn through black pepper) in a large bowl. Mix together lemon juice and olive oil, then pour over vegetable mixture. Mix well. This can be served either warm or chilled.

Stealthy Cooking Tip: Salsa is one of those terms that stirs the imagination - it screams fun food! It's a great side for meats, or it's also a great snack. Either way, it's a sneaky way to add vegetables to your diet!

Monday, August 24, 2009

Jalapeno Gold Jelly

I wrote last week about some easy canning recipes. I made this jelly using my abundant jalapeno peppers. Several friends have tasted this jelly and requested the recipe, so here it is. I based this on a similar recipe from Ball's Complete Book of Home Preserving. The jelly is excellent with cheese, and I've used it already as a spicy glaze for grilled chicken.


Ingredients:

1/3 cup finely chopped dried apricots

3/4 cup white vinegar

1/4 cup finely chopped red onion

1/4 cup finely chopped red bell pepper

1/4 cup finely chopped jalapeno pepper

3 cups granulated sugar

1 pouch liquid pectin

Directions:

Finely chop apricots by first slicing into 1/8 inch slices, then cutting the slices into 1/4 inch pieces. Place the apricots in a glass bowl and add the vinegar. Cover and let sit at least 4 hours or overnight. Chop the remaining vegetables in the same manner. Do wear rubber gloves when chopping the jalapeno pepper. If you don't, see the tip below. For a tamer version, remove the white membranes and seeds from the jalapenos. If you like more heat, keep the membranes and seeds, or use a hotter pepper like habanero or Scotch bonnet.

Meanwhile, prepare canning equipment. Prepare canning jars by washing with hot, soapy water. Prepare new two-part canning lids and screw tops by washing and covering the lids with hot water. Prepare canner by filling a large, deep saucepan with water, and bringing the water to a boil. The saucepan should be deep enough so that it is 3 " deeper than the tallest jar you will be using. Once all jars and lids are clean, and canner water is boiling, begin to make the jelly.

Put apricots and vinegar into a deep stainless steel saucepan. Add onion, red pepper, jalapeno pepper, and sugar. Stir constantly, over high heat, until the mixture comes to a full rolling boil, a boil that cannot be stirred down. Stir in the pectin. Boil hard, continuing to stir constantly, for 1 full minute. Remove from heat and stir off the foam. Ladle hot jelly into jars, leaving 1/8" headspace. Wipe rims with a clean, wet cloth. Center a clean lid on the jar, screwing the band down until it is fingertip tight. Place jars in the canner, making sure there is a minimum of 1 inch of water above the top of the jars. Cover, bring water to a boil, and boil for 10 minutes. Remove lid, letting jars sit for 5 minutes. Remove jars and let sit for 15 minutes. Tilt and rotate jars, but don't shake them, to suspend vegetables and apricots through the jelly.

Makes three 8-oz jars of jelly.

Stealthy Cooking Tip: Jalapenos, like all hot peppers, get their heat from capsaicin. It burns skin, like your hands, and can be especially painful if you then rub your mouth or eyes before the capsaicsin wears off. If, like me, you don't follow directions well, you might have forgotten the need to wear rubber gloves. Your hands will feel like they're on fire, but there's no visible burn. What I found works best to take away the burning feeling is to soak your hands in cold water for 20 to 30 minutes intervals, alternating with washing hands with shampoo or other oil reducing liquid soap to remove some of the oils from the hands. Repeat for about 4 hours, when the burn will begin to fade. Hopefully, once you burn your hands working with hot peppers, you'll always wear gloves again!

Friday, August 7, 2009

The Great Veggie Dip Taste Off

I tried a great experiment with my grandkids ... and it worked, even better than I expected. Here's the plan. I had three dips, three veggie dippers, along with a paper chart and pencil for everyone, so that we could write down which dip we liked best with each dipper. I made up three dips, each made with some good veggies. The first was hummus, made with garbanzo beans and sesame tahini. The second was guacamole, made with fresh avocados. The third was fresh garden salsa, made with tomatoes and peppers, straight out of the garden. Next, I prepared the dippers. Each plate had three carrot sticks, three celery sticks, and three jicama sticks. Finally, I prepared the charts. Everyone had their own chart, and we were keeping a secret about what we liked best until all the tasting had been done.

Well, it was a great success! The whole point was to get the kids to eat veggies for a snack, which worked like a dream. We all had great fun trying the different dips with the different veggies. Then, we compared our results. I was sure they wouldn't like some of the combinations, but what a surprise. I thought the jicama and hummus tasted gross, but one of my grandkids said it tasted like sweet peanut butter, and by the way, could he have more, please? If I made one mistake, it was underestimating how well the experiment would work. I had a plate of chips all ready, as a sort of reward for trying all these veggies. But, instead, the kids asked for more carrots and jicama, so they could be sure their results were right. Wow! Never underestimate the possibilities of a taste off!


Stealthy Cooking Tip: Come up with your own idea for a taste off. Kids love games, and also love to have their opinions heard. Other ideas might be what kind of fruit tastes best, or which way a vegetable tastes best: raw, steamed, or baked. Whatever you do, just make sure all the options are healthy!

Wednesday, August 5, 2009

Fabulous Guacamole - Two Ways

Here's a healthy recipe that's a snap to make, either the fast way or the faster way. I've developed the faster way because I know that it's often saving a few minutes that makes all the difference in today's busy world. Come home from work, and everyone wants a quick snack before dinner, so here's a quick (and even quicker) way with guacamole.


Ingredients:

2 avocados
1/4 cup chopped tomato
2 Tbs. chopped onion
2 Tbs. soft low fat cream cheese
1 chopped jalapeno pepper (optional)
1 Tbs. lemon juice
1/4 tsp chopped garlic
salt and pepper to taste
hot sauce, like tabasco, to taste

Directions:

Halve avocados, remove pit, and scoop out flesh. Put avocado, onion, cream cheese, jalapeno, lemon juice and garlic in a food processor. Pulse several times to combine. Add salt, pepper, and hot sauce to taste. Here's a note about jalapeno peppers. The heat is mostly in the ribs and seeds. If you'd like some heat, but not a lot, cut the pepper in half, remove the white ribs and seeds, and then chop the pepper.


Here's the easier version - still healthy, but much, much quicker to prepare.

EASY Ingredients:

2 avocados
2 Tbs. soft low fat cream cheese
1/4 cup tomato salsa, plus 1-2 Tbs. more if needed
1 Tbs. lemon juice

EASY Directions:

Combine all ingredients in a food processor. Pulse to combine. Add additional tomato salsa, if the guacamole is too thick. If you don't have a food processor, mash the avocados in a large bowl. Add remaining ingredients, and mix well to combine. Again, you can adjust the consistency by adding more salsa if needed.

Stealthy Cooking Tip: Avocados sometimes get a bad rap because they're 20% fat, but they're an excellent source of good fats, health-promoting monounsaturated fats. The oils provided include oleic acid and linoleic acid, both of which may help to lower cholesterol. Avocados also are a great source of potassium, vitamin E, B vitamins, and fiber.